Last price update was: February 27, 2025 8:18 am
×
Product prices and availability are accurate as of the date/time indicated and are subject to change. Any price and availability information displayed on Amazon at the time of purchase will apply to the purchase of this product.
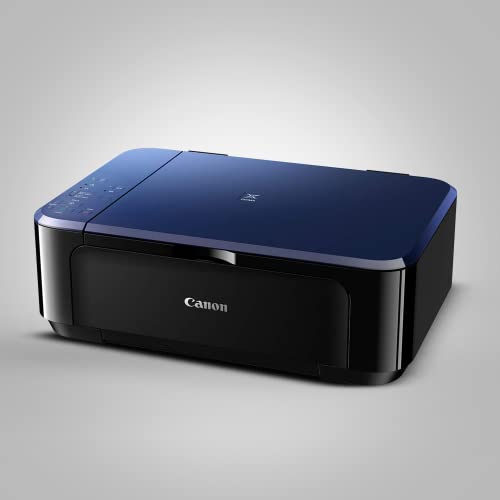
Canon PIXMA E560 All in One (Print, Scan, Copy) WiFi Ink Efficient Colour Printer with Auto Duplex Printing for Home


Set Lowest Price Alert
×
Notify me, when price drops
Set Alert for Product: Canon PIXMA E560 All in One (Print, Scan, Copy) WiFi Ink Efficient Colour Printer with Auto Duplex Printing for Home - Rs. 8,067

₹8,067
Best deal at:  Amazon.in
Buy for best price
Set Lowest Price Alert
×
Notify me, when price drops
Set Alert for Product: Canon PIXMA E560 All in One (Print, Scan, Copy) WiFi Ink Efficient Colour Printer with Auto Duplex Printing for Home - Rs. 8,067
Last Amazon price update was: February 27, 2025 8:18 am
×
Product prices and availability are accurate as of the date/time indicated and are subject to change. Any price and availability information displayed on Amazon.com (Amazon.in, Amazon.co.uk, Amazon.de, etc) at the time of purchase will apply to the purchase of this product.
- All prices mentioned above are in Indian Rupee.
- This product is available at Amazon.in.
- At amazon.in you can purchase Canon PIXMA E560 All in One (Print, Scan, Copy) WiFi Ink Efficient Colour Printer with Auto Duplex Printing for Home for only Rs. 8,067
- The lowest price of Canon PIXMA E560 All in One (Print, Scan, Copy) WiFi Ink Efficient Colour Printer with Auto Duplex Printing for Home was obtained on February 27, 2025 8:18 am.
Canon PIXMA E560 All in One (Print, Scan, Copy) WiFi Ink Efficient Colour Printer with Auto Duplex Printing for Home
₹8,067
Canon PIXMA E560 All in One (Print, Scan, Copy) WiFi Ink Efficient Colour Printer with Auto Duplex Printing for Home Prices

Rs. 8,067
February 27, 2025 8:18 am
×
Product prices and availability are accurate as of the date/time indicated and are subject to change. Any price and availability information displayed on Amazon.com (Amazon.in, Amazon.co.uk, Amazon.de, etc) at the time of purchase will apply to the purchase of this product.
Price History
-
Description
Create Your Free Price Drop Alert!
Set Alert for Canon PIXMA E560 All in One (Print, Scan, Copy) WiFi Ink Efficient Colour... - Rs. 8,067
Additional information
Specification: Canon PIXMA E560 All in One (Print, Scan, Copy) WiFi Ink Efficient Colour Printer with Auto Duplex Printing for Home
|
Reviews (4)
4 reviews for Canon PIXMA E560 All in One (Print, Scan, Copy) WiFi Ink Efficient Colour Printer with Auto Duplex Printing for Home
Show all
Most Helpful
Highest Rating
Lowest Rating


Kai –
Though it took me time to set it up as there was no manual but the printing quality is very good and fast
Ruthvik –
Some person here said, this printer can’t print with a single sheet in the Paper loading tray. That’s the 1st thing I checked after buying this Printer.
It turns out, you can Print even with a single sheet of paper.
Usually when you are loading a bundle of Sheets, due to the thickness of the sheets, the paper loading rolling feeder is naturally pushed with ease. But with a single sheet, you need to slide it inside the roller for it to grip it and pull it for printing. If you do not want Paper Abrasions/Tear inside the machine, do not use any less than 75 GSM Paper.
Good Stuff:
1) Good Quality Printer & Crisp Prints.
2) Wi-Fi Printing at this price is really impressive. ( My Advice : Pl Leave DHCP ON & Don’t assign a Static IP address to the Printer unless you know what you’re doing. )
3) Best part is Auto Duplex Printing at reasonable price. (Be warned: Printing area may be reduced during Auto Duplex Printing, however, my prints were okay.)
4) Quiet Mode which can be scheduled. My quiet mode starts automatically at 11 PM and ends at 5:30 AM.
5) Power Saving Feature: Auto Power Off/On
6) Simple Uncluttered Menu & Regular Firmware Updates.
7) Regarding how long Ink would last, I Just Printed more than 1300 Pages ( Print Quality: Standard & all text ) of Black only but, both Color Cartridge and Black Cartridge is Empty. 😐
Now let’s remember: I PRINTED EVERYTHING IN BLACK, YET COLOR IS completely EMPTY.
(Draft Mode uses the least amount of Ink, Standard Mode Balanced, Best Mode depletes Ink Quickly)
Also, I printed 1250 Pages within 2 weeks of purchasing this printer. Don’t expect the same output after 4-6 months from the date of cartridge installation.
But yes, it lives up to Canon’s Claim of 800 pages Black & 300 pages Color in accordance with ISO/IEC 24712.
8) Supports Google Cloud Print. You can be at the office and Print a document at home.
Bad Stuff:
NO SCAN BUTTON ON PRINTER ! You have to load the document on the Flat-bed Scanner & hit the Scan button on your Computer! ANNOYING !
1) Uses color ink even when you select Gray-scale Print Option. It is bad that it needs color cartridge to print even in Gray Scale. Pl read the side notes carefully: Canon says “Color ink may be consumed even when printing a black-and-white document or when black-and-white printing is specified.”
My Solution to this Problem:
*) Click Windows Start Button
*) Open Devices and Printers
*) Right click on Canon E560 Series Printer
*) Open Printing Preferences
*) Click Maintenance Tab
*) Select Ink Cartridge Settings
*) you’ll notice that by Default both Black and Color Cartridges are selected. Change that to Black only.
This might put a check on color cartridge consumption.
2) Needs a color cartridge in place all the time. Doesn’t matter even if its empty, but it ought to be there.
Canon says “If a cartridge runs out of ink, you can print with either color or black cartridge, in whichever ink remains, only for a while. However the print quality may be reduced compared to when printing with both cartridges. We recommend to use a new cartridge in order to obtain optimum qualities. Even when printing with one ink only, print with leaving the empty cartridge installed. If either of the color cartridge or black cartridge is not installed, an error occurs and the machine cannot print. “
3) My iPad 2 didn’t recognize the Printer coz, it isn’t included in Air Print Model list. But still could print & scan very well from iPad with Canon PIXMA/MAXIFY App.
4) Ink Cartridges are imported from Japan and it still needs to be on an economical side. (A cost cut required)
Black Cartridge Canon Ink Tank PG-89 MRP: INR 790.00
Flipkart.com Price: Rs.628
Color Cartridge Canon Ink Tank CL-99 MRP: INR 990.00
5) More than 35 hours of usage & only on 2 occasions, Printer stopped responding & on 3 Occasion paper jam. But not a deal breaker. Paper Jams are easy to remove.
Do not Refill Cartridge for at least Two Years since there is a 2 years onsite warranty and refilling a cartridge would void it.
ShaQ –
1. Printer is pretty good, once you set it up.
2. Good luck trying to set this up before you go bald! (It is my contention that, Canon intentionally is discouraging non technical users from using ink friendly printers). There is absolutely no useful documentation on how to setup and use this. It is baffling!
3. My low rating is because of it being non user friendly!
I am completely confident without reading reviews, that most users would have had trouble setting up this one!!
For those who would like to know how to set up without breaking your head, read on.
These instructions are for setting up the printer via a wireless router (PC’s/tablets/smartphones connect with the router, and the router connects with the printer)!
There are other ways to set it up. Feel free to explore.
————————————————————————————————————————————————
There are three steps involved.
Step 1. Printer Setup to enable communication with Wireless router (One time setup)
Step 2. Enable devices to print (Add new device to print by installing drivers).
Step 3. Print from a device (This is a bit tricky and a bit frustrating).
Below, I explain the 3 steps.
—————————————————————————————————————————
Step 1. Printer Setup to enable communication with Wireless router (One time setup)
—————————————————————————————————————————
You can do this using two methods. I prefer method 2 since I haven’t enabled WPS on my modem. You should pick the method based on, If or not WPS is enabled on your wireless modem (check this in your modem configuration page).
(a) Method: Using WPS
1. Modem should have WPS enabled – Wireless Protected Setup.
2. The access point must have a physical WPS push button available. If WPS is not available then use Method 2: Standard Connection Method.
3. Check that the Security Protocols match. The modem should have the security protocol of the Printer. (WPA / WPA2)
4. Wireless modes should be supported and selected (802.11g, 802.11n, 802.11b). If device is in a particular mode, then modem should have at least that mode selected.
Setup:
1. Switch on Printer and Modem. Printer power LED should come on.
2. Hold Wi-Fi button until the orange alarm LED flashes once. Release Wi-Fi button immediately after that.
3. The green Power LED should be lit and, the blue Wi-Fi LED will flash quickly every 1-2 seconds.
4. Within 2 minutes press and hold the WPS button on the Modem until the connection is made between Modem and Printer.
When the connection is made the modem will have a WPS LED which will light up. The modem and printer should now be able to communicate with each other.
5. To verify that a successful connection is made between the printer and the modem
(a) Press and hold Stop button on the Printer.
(b) The orange alarm LED will flash.
(c) Release the Stop button after the orange alarm LED flashes 15 times.
(d) The printer will print the Network Configuration Page.
(e) In the page check the following 2 values. If the values are incorrect, then redo the above steps.
(i) Connection –> Active.
(ii) SSID –> This value is the SSID of the modem. It is the name as seen from the PC when connected to the Wi-Fi.
(f) In the same page the following values should NOT be empty. (If these values are empty then IP is not assigned. To fix this, see “3. Print from a device”).
(i) IPv4 IP Address.
(ii) IPv4 Default Gateway.
(iii) Subnet Mask.
Note: You can also verify if the connection is made by checking the router configuration page from a web browser (Not necessary if IP address is already assigned).
(a) Restart the modem.
(b) Navigate to modem configuration page ( On my modem it is 192.168.2.1).
(c) Login.
(d) Select DHCP client list. This will list all the devices that are currently connected to the modem (PC, Printer, Tablet, Mobile, etc).
(e) It should have one item in the list which corresponds to the Printer. If not the IP is not assigned.
6. If the verification succeeded, then the printer has connected successfully to the modem.
————————————————————————————————————————————————
(b) Method: Standard Connection Method
WARNING! Do not connect the USB cable until the installer prompts you to.
1. Switch on the Printer, Modem and PC.
2. Insert the setup CD and start the setup.
3. When Prompted for selecting Connection Method, select Wireless Connection.
4. Continue the setup and then select Connect to the Network.
5. In the Setup Procedure Selection Page it will prompt for 3 options,
(a) WPS.
(b) Cableless Setup.
(c) Other Setup.
6. Select Other Setup.
7. Select Wireless Setup Using the USB cable.
8. Continue the setup and install the drivers.
9. Continue the setup and when prompted to connect USB cable, only now you should connect your printer to your computer using the USB cable.
10. Continue the setup. It will prompt asking if you want to connect to the access point. Select yes.
11. Follow the instructions and complete the setup.
12. Remove the USB cable.
13. To verify that a successful connection is made between the printer and the modem
(a) Press and hold Stop button on the Printer.
(b) The orange alarm LED will flash.
(c) Release the Stop button after the orange alarm LED flashes 15 times.
(d) The printer will print the Network Configuration Page.
(e) In the page check the following 2 values. If the values incorrect then redo the above steps.
(i) Connection –> Active.
(ii) SSID –> This value should reflect the SSID of the modem. It is the name as seen from the PC when connected to the Wi-Fi.
(f) In the same page the following values should NOT be empty. (If these values are empty then IP is not assigned. To fix this, see “3. Print from a device”).
(i) IPv4 IP Address.
(ii) IPv4 Default Gateway.
(iii) Subnet Mask.
Note: You can also verify if the connection is made by checking the router configuration page from a web browser (Not necessary if IP address is already assigned).
(a) Restart the modem.
(b) Navigate to modem configuration page ( On my modem it is 192.168.2.1).
(c) Login.
(d) Select DHCP client list. This will list all the devices that are currently connected to the modem (PC, Printer, Tablet, Mobile, etc).
(e) It should have one item in the list which corresponds to the Printer. If not the IP is not assigned.
14. If the verification succeeded, then the printer has connected successfully to the modem.
————————————————————————————————————-
Step 2. Enable devices to print (Add new device to print by installing drivers).
————————————————————————————————————-
1. Use the setup CD and begin the installation.
2. When Prompted for selecting Connection Method, select Wireless Connection.
3. Continue the installation, select Connect to Network.
4. Continue the installation, select WPS.
5. Continue the installation, keep clicking next and install the drivers.
6. Once completed it will attempt to connect to the printer. (If it fails then verify to check if the printer is connected to modem successfully – See below).
7. Complete the installation.
8. Printer has been setup successfully.
————————————————————————————————
Step 3. Print from a device (This is a bit tricky and a bit frustrating).
————————————————————————————————
You are done setting up and you fire a few prints. You are happy, you go away and come back after few days to print. And guess what, sometimes you are struggling to print again. The reason is, a flaw in how the printer picks an IP from the modem. To enable print again, do the following.
1. Switch off Wireless modem, and printer (switch off printer at the plug).
2. Switch on the printer first (Printer LED should show green), and wait for a minute.
3. Now switch on the wireless modem, wait for a min or two. Once IP’s are assigned, you should be able to print.
Note: The printer is designed to be connected at the wall socket and be in a state of being switched on always. This will retain the IP. You can switch off the printer, by using the button on the printer (Green LED will disappear).
————————————————————————————————————————————————
Jitu Gogoi –
I like this product very easy to install